Creating a game can be tough… Most ideas seem simple on the surface, but rarely are. Some of the most difficult, yet rewarding, code I’ve written has come from building games. However, its a tough market to be successful in. There are hundreds if not thousands of mobile games getting released every month. Getting lost in the noise is easy and common. My biggest recommendation is to understand that building a game should be reward enough when first starting out. Even Rovio had 51 unsuccessful titles over the course of 6+ years before creating Angry Birds. The knowledge you gain by the end of a project is be enormous and only make future games better.
In this tutorial we’ll be building a game called “Shields Active”. We will start with the basic goal of the game, expand that into a simplified gameplay document, and finally build the game in SpriteKit.
Shields Active : Basic Goal
Before we start to code, we’ll need a base for our game. Having a simple one liner gives us a solid start. If our statement is longer than one or two sentences its probably too complex. For our game we’ll say :
Prevent objects traveling from one side of the screen to the other by creating other objects for them to collide with.
Now we have our simple goal for the game. This step might seem unnecessary, but the core of the game can be lost very quickly. Even with a base goal, feature creep can overcomplicate and ruin a game. We’re trying to eliminate, the “Wouldn’t it be cool if X happened.” statement. My best advice is to do one thing and then refine it. Once you have that, build upon it.
Shields Active : Game Document
With our base goal in hand we have to expand upon it. Typically we’d create a fully comprehensive game document. This would include everything from user experience to concept art. However we won’t go into that kind of depth. For simplicity sake, we’ll only be writing out basic gameplay outline. This includes things like sprites, sprite actions, user interface, user events and end scenarios.
UI:
– Orientation is landscape locked.
Before Game:
– Button in the center of the screen that says “Start”
During Game:
– Score will be in a label in the top right corner. Text saying “Score x/10”.
– A life meter is in the top left corner. A label saying “Life : 3”.
After Game:
– Label centered reading “You Win!” in a winning scenario or “You’ve Lost” in a loss scenario.
– Button that says “Play Again?”
Sprite Asteroids:
– Create one Asteroid every 1 second.
Sprite Shields:
– Created on Initialization of the game.
User Actions:
– User taps to move the Shields position to the touched location.
Asteroid Action:
– Move across the screen right to left. If they go off the screen, they are removed. The Life total is then decreased by 1.
– Will be generated with a range of speeds.
– If an Asteroid collides with a shield, the Asteroid is destroyed and the shield remains.
End Scenarios:
– If 10 Asteroids collide with the Shield, the game ends in victory. The user will be prompted to play again.
– If life is equal to 0, the game ends in loss. The user will be prompted to play again.
For a simple game that might seem like a lot of information, but each piece is important. When details aren’t written out things can get lost or left to interpretation. Just because you know how something should work, doesn’t mean that will be how a coding partner might understand it. As with any project, being as clear as possible is critical to success. One of the other benefits to settings up a document is that we now have a check list for all the tasks our application needs to accomplish. Lets start coding.
Getting Started
To build this game, we’ll be using iOS Spritekit which was introduced in iOS 7. If you don’t have any experience with Objective-C, don’t worry. This tutorial will take you step by step in building the game, and many of the concepts are transferable to other mobile game platforms.
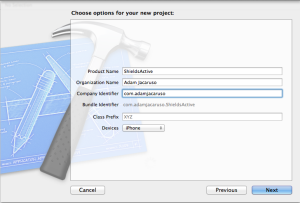
Lets begin by creating our project. Start up Xcode click File > New > Project > SpriteKit Game. That should bring up the initial setup screen for the project. Name the project “ShieldsActive” and set devices to iPhone.
Click next, and then a location to save the project. At this point Apple will use its hello world template to start us off. Go ahead and run the project, the result will launch the simulator and you’ll be presented with the SpriteKit Hello World game.
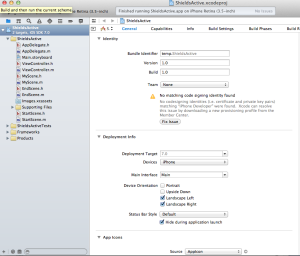
Lets start building our app by locking the orientation to landscape. In the Shields Active project file, uncheck portrait. This leaves us with Landscape left and right checked. This will make our game locked into one mode.
First Steps : Scenes and Transitions
Now that we’ve adjusted the orientation, lets get our game up and running. This is a short list of the next steps.
- Create a starting scene with some text and a button to start the game.
- Set the StartScene to be the first one loaded when the application starts.
- On the StartScene, create the action to load MyScene.
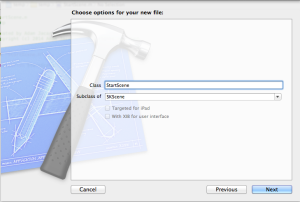
First we’ll make a new landing scene for our game. To add a new class go to File > New > File. In the iOS Cocoa Touch tab, select Objective-C class. Set the name of the file to StartScene and the subclass to SKScene, then create the file. This will add a H and M file for the class. Which stand for “Header” and “Method”, if you want to learn more on why they are called that check out this post. We won’t need to modify the header file for this class, so click on StartScene.m to get started.
You now should be looking at an almost empty file, lets add some code to change that. Add the following code to the project between @implementation and @end lines:
-(id)initWithSize:(CGSize)size {
    if (self = [super initWithSize:size]) {

        SKLabelNode *label = [SKLabelNode labelNodeWithFontNamed:@"HelveticaNeue"];
        label.text = @"Shields Active!";
        label.fontSize = 40;
        label.fontColor = [SKColor whiteColor];
        label.position = CGPointMake(self.size.width/2, self.size.height/2);
        [self addChild:label];

        SKSpriteNode *startButton = [SKSpriteNode spriteNodeWithImageNamed:@"Start"];
        startButton.position = CGPointMake(self.size.width/2, self.size.height/2 - startButton.size.height);
        startButton.name = @"StartButton";
        [self addChild: startButton];
    }
    return self;
}
Lets take a look the code. initWithSize is our default constructor, so it is called when the SKScene is initialized. Next we are adding two objects a SKLabelNode and SKSpriteNode to the scene. The SKScene is the canvas for our sprites to be placed on.
The SKLabelNode, as you might have guessed, is a text box for us to display on the screen. We set the properties of that label once the object is created. This includes text, color, font size, and position. Once all the properties are set, we use the addChild method to add the label to our scene.
SKSpriteNode works similarly. You’ll notice that when we create the object, we are passing a long a spriteNodeWithImageNamed of “Start”. This indicates what image the sprite should use based on the ones that have been imported into the project. By setting this variable the object will take on the width and height of the image we are assigning it automatically. However we haven’t added any images into our application yet! Before continuing on lets do that now.
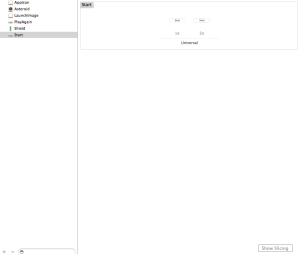
I’ve included a link to the project images here. Download the zip file and unzip it. Locate a folder in your project structure named Images.xcassets, select it . Then highlight all the image assets in the unzipped folder and drag/drop them into the opened Images.xcasset screen. There should already be an AppIcon and LaunchImage in this structure by default. Once placed in this folder, the application will be able to pull in the image files with no fuss.
On a side note, Images.xcassets is new in Xcode 5. Without getting into details, I think its saves a lot of time and effort. You should consider using it in all your future iOS projects when possible.
Now that we have our SKScene setup, lets set it to the first scene to load when our application starts up. Open the ViewController.m and change
#import “MyScene.h”
to
#import “StartScene.h”
Next inside the viewDidLoad, change the line
SKScene * scene = [MyScene sceneWithSize:skView.bounds.size];
to
SKScene * scene = [StartScene sceneWithSize:skView.bounds.size];
After that, run the application. If everything is setup correctly you should see the following screen in your simulator:
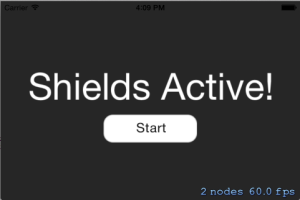
At a glance this looks fine, however there is one more change we need to make in ViewController.m before we’re done. At a glance this screen seems to be fine, however the screen dimensions are off. We’ll need a small update to fix the problem. We’ll need to replace :
viewDidLoad
to
viewWillLayoutSubviews
After making the change, run the application again. You should see a change in the size of the scene and the objects it contains:
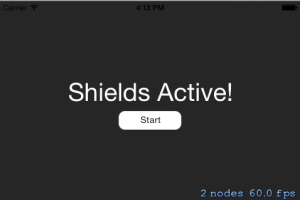
When the view is created, it doesn’t take into account if the device’s orientation is in portrait or landscape. Since the default is portrait, and we locked the application to landscape, the device is still using the dimensions of the phone as if it were in portrait orientation. By setting our scene in viewWillLayoutSubviews we know that the orientation change has already happened. This is because the orientation is set further along in stack, before viewWillLayoutSubviews but after viewDidLoad. This results in the correct screen dimensions for our application.
After running the application, you’ll notice that our start button doesn’t do anything. Lets fix that! Go back to StartScene.m, import “MyScene.h” and add the following method below initWithSize:
- (void)touchesBegan:(NSSet *)touches withEvent:(UIEvent *)event
{
    UITouch *touch = [touches anyObject];
    CGPoint location = [touch locationInNode:self];
    SKNode *node = [self nodeAtPoint:location];

    //Action for the StartButton Button
    if ([node.name isEqualToString:@"StartButton"]) {
        SKTransition *transition = [SKTransition fadeWithDuration:0.3];
        SKScene * myScene = [[MyScene alloc] initWithSize: self.size];
        [self.view presentScene:myScene transition: transition];
    }
}
This code adds a touch listener to our scene. We detect if a node was clicked with the name of StartButton, which we did in our init method. The name property is how we identify sprites in an event handler. After detecting that our button was touched we create a transition to a new scene, in this case the MyScene class. Transitions are how we go from scene to scene within our game. Creating multiple scenes for different states of the application will keep our code much cleaner and easier to use.
Creating the Game : Shield Sprite
If you run the application, and click the start button you will be taken to the Hello World code we saw earlier. Thats great, but we want to make our own game now! Open up MyScene.m and swap the initWithSize and touchesBegan methods with the following code:
-(id)initWithSize:(CGSize)size {
    if (self = [super initWithSize:size]) {
        self.shield = [SKSpriteNode spriteNodeWithImageNamed:@"Shield"];
        self.shield.position = CGPointMake(self.shield.size.width*2, self.frame.size.height/2);
        [self addChild:self.shield];
    }
    return self;
}

-(void)touchesBegan:(NSSet *)touches withEvent:(UIEvent *)event {

    for (UITouch *touch in touches) {
       CGPoint location = [touch locationInNode:self];
       self.shield.position = location;
    }
}
Also update the MyScene.h with this code:
#import <SpriteKit/SpriteKit.h>

@interface MyScene : SKScene

@property (nonatomic) SKSpriteNode * shield;

@end
In MyScene.h we are setting our scene to use the Spritekit SKPhysicsContactDelegate, which in basic terms allows us to leverage collision detection and set the gravity of our world. We don’t need it just yet, but we’ll be adding code that requires it soon enough. In the next line we are creating a SKSpriteNode object called shield. We’ll be using shield extensively, so defining it here will accomplish that functionality.
In MyScene.m init method, we define the Shield object we created in the header file. Next, we set its position and add it to the screen. This should be familiar as it is the same way we added a SKSpriteNode in our StartScene class. In our touchesBegan, we are detecting the touch and setting our Shield’s position to the touch location. If you run the application you can see the sprite created and we have the ability to move it around the screen by touching different locations. A good start!
Creating the Game : Adding Asteroids
Now our shield needs something to interact with, so lets add some Asteroids! Replace the update method then create a new method called createAsteroid. Update your project with the following :
-(void)update:(CFTimeInterval)currentTime {

    CFTimeInterval timeSinceLast = currentTime - self.lastUpdateTimeInterval;
    self.lastUpdateTimeInterval = currentTime;
    self.lastSpawnTimeInterval += timeSinceLast;
    if (self.lastSpawnTimeInterval > 1) {
        self.lastSpawnTimeInterval = 0;
        [self createAsteroid];
    }
}

-(void)createAsteroid {

    SKSpriteNode * asteroid = [SKSpriteNode spriteNodeWithImageNamed:@"Asteroid"];

    int minY = asteroid.size.height / 2;
    int maxY = self.frame.size.height - ((asteroid.size.height / 2) + 40);
    int rangeY = maxY - minY;
    int actualY = (arc4random() % rangeY) + minY;

    asteroid.position = CGPointMake(self.frame.size.width + asteroid.size.width/2, actualY);
    [self addChild:asteroid];

    int minDuration = 1.0;
    int maxDuration = 3.0;
    int rangeDuration = maxDuration - minDuration;
    int actualDuration = (arc4random() % rangeDuration) + minDuration;

    SKAction * actionMove = [SKAction moveTo:CGPointMake(-asteroid.size.width/2, actualY) duration:actualDuration];
    SKAction * actionMoveDone = [SKAction removeFromParent];
    [asteroid runAction:[SKAction sequence:@[actionMove, actionMoveDone]]];
}
In MyScene.h under the shield property add :
@property (nonatomic) NSTimeInterval lastSpawnTimeInterval;
@property (nonatomic) NSTimeInterval lastUpdateTimeInterval;
Lots of new code! The update method is called by default and is given the current time. Its also invoked every millisecond. Since we don’t have control over how often its called we have to build in our own way of keeping track. In this code we are setting up CFTimeInterval to keep track of how long in between updates. This allows us to control how much time has passed before calling the createAsteroid method. We’re setting lastSpawnTimeInterval > 1 so that the method is called every 1 second. If we increase to 3, it would be every 3 seconds.
Now take a look at createAsteroid. First we create an asteroid SKSpriteNode and set the position to be beyond the view of the screen with a random Y value. This should seem similar to how we created the shield.
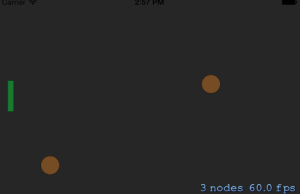
According to our gameplay outline the asteroid has to move across the screen from right to left, to do this we’ll need a runAction. This will take in an array of SKActions to be executed in sequence. For our purpose we’ll have two, actionMove and actionMoveDone. actionMove takes our asteroids current position and has it move on the X axis to the left till it goes slightly off screen. Once it reaches its destination we call actionMoveDone, which removes the sprite from the screen. This is to keep our environment clean and keep memory in check. Run the projects to see asteroids flying across the screen!
So far so good! But our the asteroids go right through the shield. Lets make our shield pull its weight and block those asteroids. To do this, we’ll need to add collision detection. Lets add some code to our MyScene.m :
At the top of the page, between @implementation and initWithSize add :
static const uint32_t shieldCategory =  0x1 << 0;
static const uint32_t asteroidCategory =  0x1 << 1;
In the init method below [self addChild:self.shield] add:
self.shield.physicsBody = [SKPhysicsBody bodyWithRectangleOfSize:self.shield.size];
self.shield.physicsBody.categoryBitMask = shieldCategory;
self.shield.physicsBody.contactTestBitMask = asteroidCategory;
self.shield.physicsBody.collisionBitMask = 0;

self.physicsWorld.gravity = CGVectorMake(0,0);
self.physicsWorld.contactDelegate = self;
At the bottom of createAsteroid add:
asteroid.physicsBody = [SKPhysicsBody bodyWithRectangleOfSize:asteroid.size];
asteroid.physicsBody.categoryBitMask = asteroidCategory;
asteroid.physicsBody.contactTestBitMask = shieldCategory;
asteroid.physicsBody.collisionBitMask = 0;
Then add the following methods at the bottom of the class:
- (void)didBeginContact:(SKPhysicsContact *)contact
{
    SKPhysicsBody *firstBody, *secondBody;

    if (contact.bodyA.categoryBitMask < contact.bodyB.categoryBitMask){
        firstBody = contact.bodyA;
        secondBody = contact.bodyB;
    } else {
        firstBody = contact.bodyB;
        secondBody = contact.bodyA;
    }

    if ((firstBody.categoryBitMask & shieldCategory) != 0 && (secondBody.categoryBitMask & asteroidCategory) != 0){
        [self shield:(SKSpriteNode *) firstBody.node didCollideWithasteroid:(SKSpriteNode *) secondBody.node];
    }
}

- (void)shield:(SKSpriteNode *)shield didCollideWithasteroid:(SKSpriteNode *)asteroid {
    [asteroid removeFromParent];
 }
Once the code has been added, run the project. Now our asteroids are removed when they collide with a shield. Perfect! Lets walk through the code we added. If you take a look at init and createAsteriod you’ll notice the some similarity in the code around “physicsBody”. In this area we are setting the objects to have physics bodies. Without that the objects won’t be able to detect collisions in our didBeginContact method. You’ll notice that we set two “static const uint32_t “ variables at the top of the application. This globally establishes the two types of objects when we get into the collision detection method.
Next we have to set the global gravity of our scene. We are setting it to be 0, otherwise by default SpriteKit will apply earth like gravity to objects with physicsBody. Try removing the lines from our init, run the application and see what happens:
self.physicsWorld.gravity = CGVectorMake(0,0);
self.physicsWorld.contactDelegate = self;
You’ll notice how all our sprite now drop off the screen. This is important in many games, but for ours we’ll want to stick with no gravity so add that code back in.
Since our sprite objects now interact with each other, we need to detect when they collide. By default Spritekit will call a didBeginContact method if any physicsBody object collides with another. Our game logic only cares about Shield to Asteroid collisions, not Asteroid to Asteroid, so we’ll have to code that ourselves. Take a look at didBeginContact, we detect the two bodies and compare them to check for the collision of an asteroid and shield. If true we call our shield did collide with asteroid method, which removes the asteroid sprite.
Setting up UI
Our game is coming along nicely, but we have no way of telling if we’re winning or losing! Lets add some basic UI elements to keep track of our win or lose case. Update the MyScene.h file with the following properties:
@property (nonatomic) SKLabelNode * scoreLabel;
@property (nonatomic) SKLabelNode * lifeLabel;
@property (nonatomic) int Life;
@property (nonatomic) int Score;
Within the MyScene.m we’ll be making some changes as well. In init we’ll be adding a call to the init UI method. This can be placed below where we set our gravity code.
[self createUI];
Next we’ll need to add this method :
-(void)createUI {

    self.Score = 0;
    self.scoreLabel = [SKLabelNode labelNodeWithFontNamed:@"HelveticaNeue"];
    self.scoreLabel.fontSize = 15;
    self.scoreLabel.fontColor = [SKColor whiteColor];
    self.scoreLabel.text = [NSString stringWithFormat:@"Score: %d / 10", self.Score];
    self.scoreLabel.position = CGPointMake(self.size.width - self.scoreLabel.frame.size.width/2 - 40, self.size.height - (40 + self.scoreLabel.frame.size.height/2));
    [self addChild:self.scoreLabel];

    self.Life = 3;
    self.lifeLabel = [SKLabelNode labelNodeWithFontNamed:@"HelveticaNeue"];
    self.lifeLabel.fontSize = 15;
    self.lifeLabel.fontColor = [SKColor whiteColor];
    self.lifeLabel.text = [NSString stringWithFormat:@"Life: %d", self.Life];
    self.lifeLabel.position = CGPointMake(self.lifeLabel.frame.size.width/2 + 40, self.size.height - (40 + self.lifeLabel.frame.size.height/2));
    [self addChild:self.lifeLabel];
}
This will provide us with some SKLabels of basic information, but we need to update them when something happens! Lets make some modifications to the createAsteroid and shielddidCollideWithasteroid:
In createAsteroid replace :
[asteroid runAction:[SKAction sequence:@[actionMove, actionMoveDone]]];
with
SKAction * loseAction = [SKAction runBlock:^{
        self.Life -= 1;
        self.lifeLabel.text = [NSString stringWithFormat:@"Life: %d", self.Life];
}];
[asteroid runAction:[SKAction sequence:@[actionMove, loseAction, actionMoveDone]]];
In shielddidCollideWithasteroid below [asteroid removeFromParent]; add:
self.Score += 1;
self.scoreLabel.text = [NSString stringWithFormat:@"Score: %d / 10", self.Score];
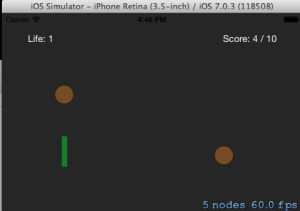
In createAsteroid we add another SKAction to help us update the Life when an asteroid goes off the screen. Similarly in shielddidCollideWithasteroid, we modify the text of Score to reflect when an asteroid is destroyed. Run the application and you’ll see the following.
Adding Win and Loss Conditions
Our game can keep track of Life and Score, but we don’t have any win or lose conditions yet. To do this we’ll be making some modifications to MyScene.m and creating a new scene class ‘EndScene’. The EndScene will handle either case, and allow our users to play again. Clean and simple!
Start by adding the following to the top of the MyScene.m :
#import "EndScene.h"
Next in createAsteroid replace the loseAction block with the following:
SKAction * loseAction = [SKAction runBlock:^{
        self.Life -= 1;
        self.lifeLabel.text = [NSString stringWithFormat:@"Life: %d", self.Life];
        if (self.Life == 0) {
            SKTransition *reveal = [SKTransition flipHorizontalWithDuration:0.5];
            SKScene * gameOverScene = [[EndScene alloc] initWithSize:self.size userHasWon:NO];
            [self.view presentScene:gameOverScene transition: reveal];
        }
}];
Next in shielddidCollideWithasteroid add the following to the bottom part of the method:
if (self.Score >= 10) {
        SKTransition *transition = [SKTransition fadeWithDuration:0.3];
        SKScene * gameOverScene = [[EndScene alloc] initWithSize:self.size userHasWon:YES];
        [self.view presentScene:gameOverScene transition: transition];
}
This will set our lose condition to fire if life goes below 1 and our win condition to fire if Score is 10 or greater. In those events, we are calling a transition to a new scene, just like we did back in StartScene.m at the beginning of the project. The only difference is that we are calling initWithSize with an additional parameter of userHasWon. In this case we are overloading the native init function of that scene. This allows us to pass the key data we need to setup the screen correctly. In our case, if a user won or lost. Lets create a new SKScene, just like we did earlier but this time with the name EndScene.
In our EndScene.h :
@interface EndScene : SKScene

-(id)initWithSize:(CGSize)size userHasWon:(BOOL)userHasWon;

@end
In our EndScene.m :
#import "EndScene.h"
#import "MyScene.h"
@implementation EndScene
-(id)initWithSize:(CGSize)size userHasWon:(BOOL)userHasWon {
if (self = [super initWithSize:size]) {
NSString * gameEndText;
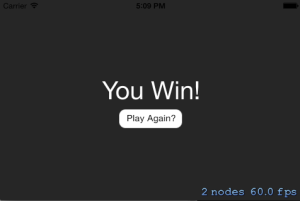
if (userHasWon) {
gameEndText = @"You Win!";
} else {
gameEndText = @"You’ve Lost.";
}
SKLabelNode *label = [SKLabelNode labelNodeWithFontNamed:@"HelveticaNeue"];
label.text = gameEndText;
label.fontSize = 40;
label.fontColor = [SKColor whiteColor];
label.position = CGPointMake(self.size.width/2, self.size.height/2);
[self addChild:label];
SKSpriteNode *playAgain = [SKSpriteNode spriteNodeWithImageNamed:@"PlayAgain"];
playAgain.position = CGPointMake(self.size.width/2, self.size.height/2 - playAgain.size.height);
playAgain.name = @"playAgain";
[self addChild: playAgain];
}
return self;
}
- (void)touchesBegan:(NSSet *)touches withEvent:(UIEvent *)event
{
UITouch *touch = [touches anyObject];
CGPoint location = [touch locationInNode:self];
SKNode *node = [self nodeAtPoint:location];
//Action for the playAgain Button
if ([node.name isEqualToString:@"playAgain"]) {
SKTransition *transition = [SKTransition fadeWithDuration:0.3];
SKScene * myScene = [[MyScene alloc] initWithSize: self.size];
[self.view presentScene:myScene transition: transition];
}
}
@end
This code should all seem very familiar as it is almost identical to StartScene. The major difference being the name of our button and the addition of gameEndText which sets the correct text for the label based on the boolean value that was passed along in the init function. The play again button, allows us to go back to the MyScene which will restart the init causing the game to start over again. Now we have a complete game!
Summary
You’ve done it! At this point you should have a basic game with a start screen, game play, and end screen. It might seem basic, but these building blocks can lead to bigger and better games. I hope you’ve gained a better understanding of SpriteKit from this tutorial and go build your own games!
The final source code for the finished project can be found on my github page.
https://github.com/ajacaruso/ShieldsActive